Chào bạn! gửi bạn cách làm như sau
Step by Step to insert Wav File to TDE system.
Wav format must meet below requirement:
Bit Rate : 128kbps
Audio sample size: 16bit
Channels : 1(mono)
Audio sample rate: 8kHz
Audio format: PCM
Format file upload by Software Sony Sound Forge
How to insert Wav?
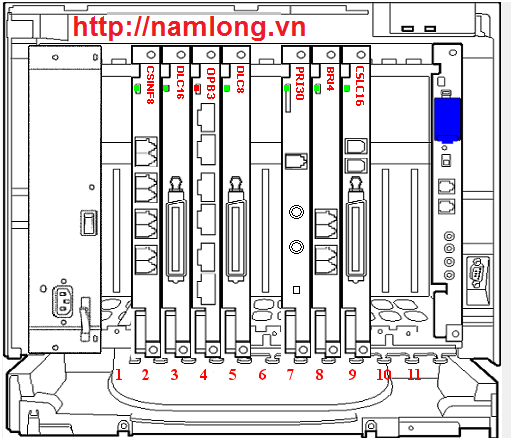
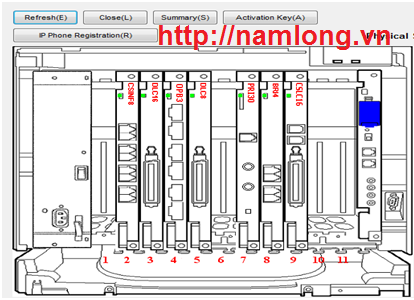
1. Set OPB3 card to “OUS” and select “Card Property”
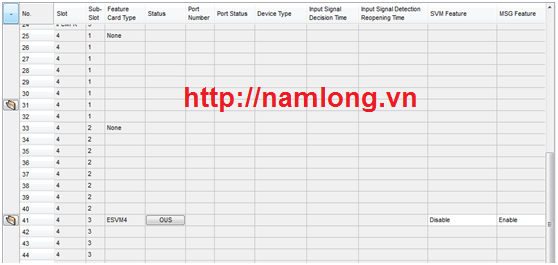
2. Put ESVM “OUS” and “disable” the SVM Feature. (Eg. ESVM4 below)
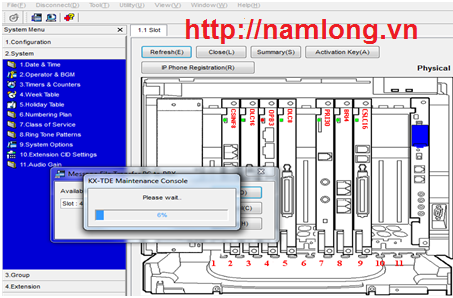
3. Goto Utility and select “Message file transfer PC to PBX”
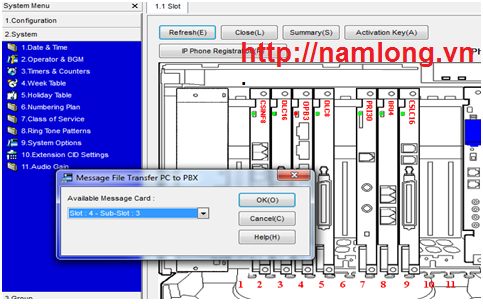
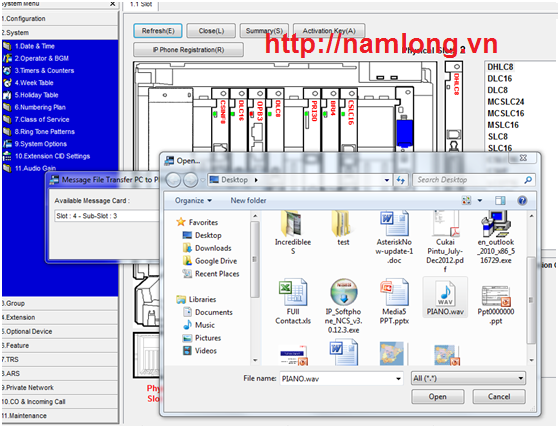
4. Select the ESVM slot like above and select the xx.wav file to insert.
5. Then it will start transferring the WAV file by showing % completed.
6. Put OPB3 card ”INS”
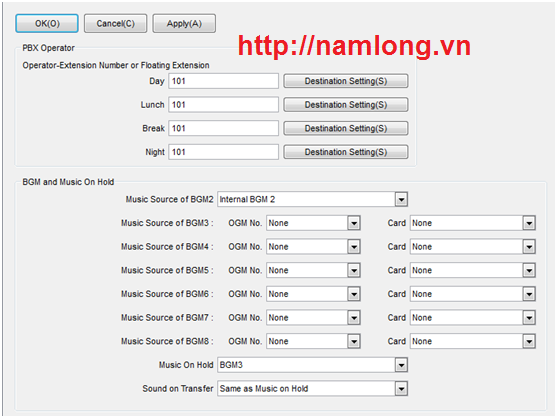
7. Goto 2.System/2.Operator & BGM. You will see all the selection had been available as previously all are dehighlighted.
8. Example. Select “ESVM Card (Slot4-3) and Music On Hold “BGM3”
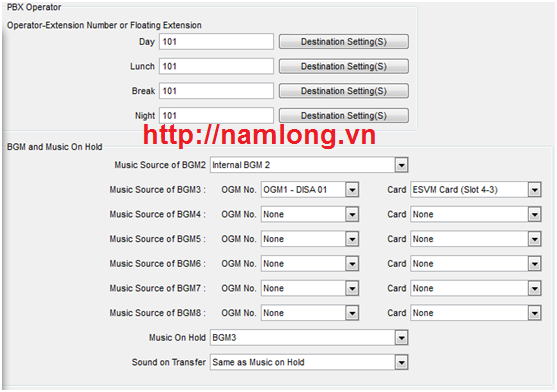
9. Then try to make call and put on hold. You will be able to hear the inserted music.
Chúc bạn thành công!